Recent Posts
What Are the Common Signs of Water Damage in Walls?
4/30/2024 (Permalink)
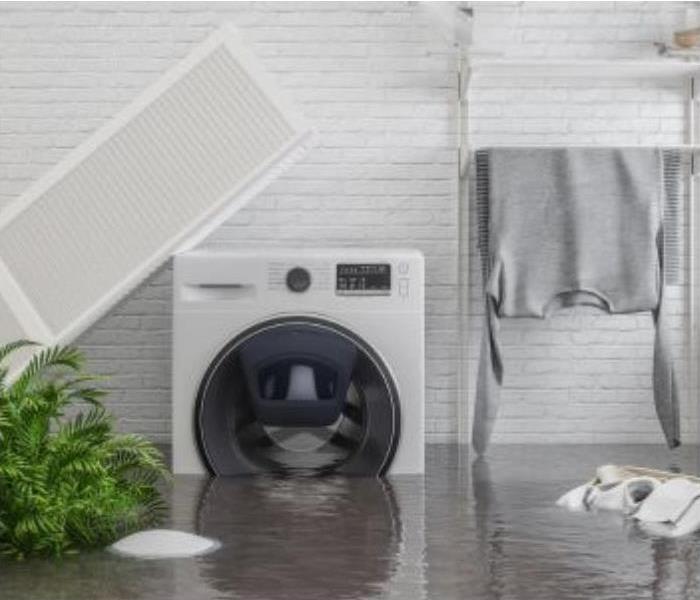
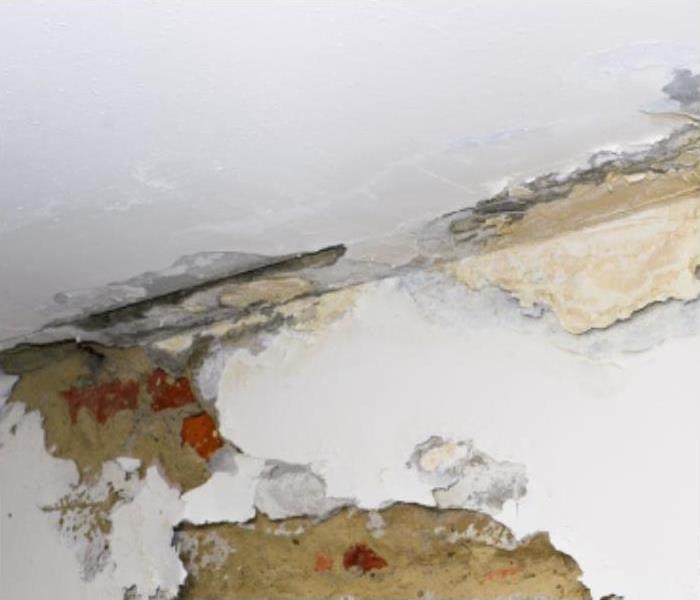
 Water Damaged Wall
Water damage in Weymouth, MA, is no stranger to homeowners, especially with the region's weather patterns. From heavy rains to burst pipes, water can seep into your walls causing unseen damage. Let's explore how you can identify these common signs of water damage, the ways to tackle them, and some prevention tips you can apply. Plus, if you happen to experience water damage Weymouth MA, we’ve got you covered.
How Can Water Seep into Your Walls?
Understanding how water infiltrates your walls is crucial for prevention. It can enter through leaks in your roof, poorly sealed windows, plumbing issues, or even through the foundation. Once inside, it can spread quickly, causing extensive wall water damage if left unchecked.
Signs of Water Damage in Walls
In this section, we'll dive into the telltale signs that your walls may be suffering from water damage. From subtle discolorations to more apparent structural changes, recognizing these indicators is crucial for tackling any underlying issues. Here are the common signs that could be lurking behind your walls, signaling potential water damage:
- Discoloration or Water Stains: These are some of the most obvious signs of water damage. Look for discoloration or yellowing on your walls or ceiling, especially after heavy rains or plumbing mishaps.
- Peeling or Flaking Paint: Water can cause paint to bubble, peel, or flake off the surface. If you notice this happening, it's a clear indicator of moisture beneath the paint layers.
- Warping Drywall: When drywall absorbs water, it can swell and warp, leading to bulges or curves in the wall surface.
- Cracks or Bubbling Wallpaper: Keep an eye out for cracks or bubbles forming under the wallpaper, as these can indicate moisture build-up behind the surface.
- Efflorescence: Efflorescence appears as white, chalky deposits on the surface of walls and is caused by mineral deposits left behind as water evaporates. It often indicates a history of water intrusion and should be tackled as soon as possible to prevent further damage.
- Spongy Drywall: Press gently on your walls; if they feel soft or spongy, it's a sign of water damage. Spongy drywall indicates that moisture has affected its integrity.
- Musty Odor: A musty smell, similar to damp basements, is a telltale sign of mold growth due to water seepage.
- Visible Mold Growth: If you spot mold colonies growing on your walls, it's a severe indication of prolonged water damage. Mold develops in moist environments, indicating an ongoing moisture issue.
Can You Remedy the Water Damage in the Walls?
Yes, you can tackle water damage in walls. Start by identifying and fixing the source of the water intrusion. Depending on the extent of the damage, you may need to remove and replace affected materials like drywall or insulation. In severe cases, you might require professional assistance from a water damage restoration company like SERVPRO of Weymouth, Hingham, and Quincy.
The Importance of Fast Water Damage Remediation
Tackling water damage quickly is crucial to prevent further deterioration of your home's structure and to minimize potential health risks. Here's why fast water damage remediation is essential:
- Structural Integrity:
Water can weaken the structural integrity of your walls, floors, and ceilings over time. If left untreated, water damage can affect the stability of your home's foundation and framing, leading to costly repairs and safety hazards.
- Mold Growth:
Excess moisture provides an ideal environment for mold to grow. Mold can start to grow within 24-48 hours of water intrusion. Once it takes hold, it can spread rapidly throughout your home. Mold exposure can cause allergic reactions, respiratory issues, and other health problems, particularly for individuals with asthma or weakened immune systems.
- Property Damage:
Water damage can ruin belongings such as furniture, electronics, and personal belongings stored in affected areas. Carpets, upholstery, and wooden furniture are especially vulnerable to water damage and may require costly replacement if not dried and cleaned on time.
Prevention Tips
Preventing water damage in walls is key to maintaining a healthy home environment. Here are some tips:
- Maintain Proper Grading: Ensure that the ground around your home slopes away from the foundation to prevent water from pooling and seeping into the walls.
- Install a Sump Pump: A sump pump can help prevent water from accumulating in basements or crawl spaces by pumping it away from your home's foundation.
- Apply Waterproof Sealant: Apply waterproof sealant to exterior walls, especially in areas prone to water exposure such as around windows, doors, and foundation cracks.
- Inspect Caulking and Sealants Regularly: Check and replace old or damaged caulking around windows, doors, and plumbing penetrations to prevent water infiltration.
- Monitor Indoor Humidity Levels: Keep indoor humidity levels below 60% to prevent condensation and moisture buildup on walls. Use dehumidifiers if necessary, especially in damp areas like basements and bathrooms.
- Regular Roof Maintenance: Inspect your roof regularly for damaged or missing shingles, and repair any issues quickly to prevent water from leaking into your home.
- Protect Pipes from Freezing: Insulate exposed pipes to prevent them from freezing and bursting during cold weather, which can lead to water damage inside your walls.
- Install Flood Sensors: Consider installing flood sensors or a smart water leak detection system that can alert you to potential water leaks before they cause significant damage.
- Keep Gutters Clean and Clear: Regularly clean and inspect gutters and downspouts to ensure proper drainage away from your home. Clogged gutters can cause water to overflow and seep into the walls.
- Stay Informed and Prepared: Familiarize yourself with local flood risks and evacuation routes. Consider registering for alerts from FEMA to stay updated on potential flooding in your area.
Contact SERVPRO of Weymouth, Hingham, and Quincy
If you suspect water damage in your walls or need professional assistance with water damage restoration, don't hesitate to contact us. Our experienced team at SERVPRO of Weymouth, Hingham, and Quincy is here to help you restore your home to its pre-damage condition. Reach out to our professionals at (781) 337-0344 or send us a message by filling out our online form. We are available 24/7 to answer your water damage emergencies.
How to Clean Smoke Damage on Walls and Ceilings?
4/30/2024 (Permalink)
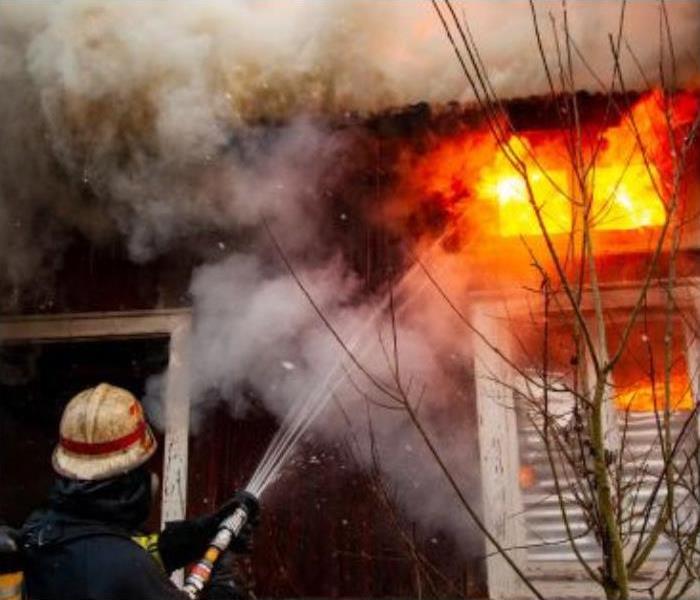
 Cleaning Smoke Damaged Wall
If you've experienced fire damage in your home or business, dealing with the post-fire period can be overwhelming. Smoke damage on walls and ceilings is a common issue after a fire, but knowing how to properly clean it can make a big difference. In this blog post, we'll guide you through the process of cleaning smoke damage step by step, using basic materials and tools that you likely already have at home. If you have experienced Weymouth fire damage and are looking for professional help, keep reading to learn more.
Signs of Fire Damage on Walls and Ceilings
Before you start cleaning, it's important to identify the signs of fire damage on your walls and ceilings. Common signs of fire damage include:
- Discoloration: One of the most obvious signs of fire damage is discoloration on walls and ceilings. Soot and smoke residue can leave behind dark or blackened patches, contrasting with the original color of the surfaces.
- Strong Odor: Another indication of fire damage is the lingering smell of smoke. Even after the visible soot has been removed, the odor can persist, indicating the presence of smoke particles embedded in the surfaces.
- Gritty Texture: Soot residue often leaves a gritty or powdery texture on walls and ceilings. Running your fingers along the surfaces may reveal a rough or abrasive feel, signaling the presence of smoke residue.
- Staining: Fire damage can manifest as visible stains on walls and ceilings. These stains may vary in intensity, ranging from light smudges to heavy, greasy deposits, depending on the severity of the fire and the materials burned.
- Soot Trails: Soot particles can travel along air currents during a fire, leaving behind distinctive patterns known as soot trails. These trails may appear as streaks or smudges on walls and ceilings, indicating the pathways taken by smoke during the fire event.
Now that you have seen the most common signs of water damage, the next challenge is to find out the best way to remove soot or strong unpleasant odors.
How to Clean Smoke Damage on Walls and Ceilings?
From gathering the important materials to using the proper techniques, we'll guide you through each stage to ensure thorough restoration and safety. Let's dive into refreshing your walls and ceilings from the effects of smoke damage.
Cleaning Materials and Tools Needed
Before cleaning, you need to gather the materials and tools to use. Here’s the list of things you’ll need:
- Chemical sponge
- HEPA vacuum cleaner
- Cleaning solutions such as vinegar, baking soda, rubbing alcohol, or hydrogen peroxide
- Detergent or degreaser
- Commercial air scrubbers
Steps
Now that you have your tools ready you are probably asking: How to remove soot from your walls and ceilings? So, let's delve into the steps for cleaning smoke damage on walls and ceilings! A tip: Start with ceilings before moving on to walls.
- Safety First: Before you begin cleaning, ensure proper ventilation by opening windows or using fans, and adhering to the fire safety protocols. Also, wear protective gear such as gloves and a mask to avoid inhaling soot particles.
- Dry Cleaning: Start by using a chemical sponge to gently wipe away loose soot from the walls and ceilings. Avoid pressing too hard to prevent smudging.
- Vacuuming: Use a HEPA vacuum cleaner to remove remaining soot particles from the surfaces. Be thorough, paying extra attention to corners and crevices.
- Wet Cleaning: Prepare a cleaning solution using one of the mentioned ingredients (vinegar, baking soda, rubbing alcohol, or hydrogen peroxide) mixed with water or detergent. Apply the solution to a clean cloth or sponge and gently scrub the affected areas.
- Rinsing: After scrubbing, rinse the walls and ceilings with clean water to remove any residue from the cleaning solution.
- Drying: Allow the surfaces to air dry completely or use fans to speed up the process.
- Odor Removal: After cleaning the smoke damage, use commercial air scrubbers or air purifiers to eliminate lingering odors from your walls and ceilings. These devices work to filter out airborne particles and neutralize odors, ensuring a fresh and clean environment.
Additional Tips
Here are some additional tips that you can take into account:
- Spot Test Cleaning Solutions: Before applying any cleaning solution to larger areas, test a solution on a small, less noticeable area to ensure compatibility with the paint or finish. This helps prevent unintended damage and ensures safe and effective cleaning.
- Avoid Ammonia-Based Cleaners: Avoid using ammonia-based cleaners when tackling smoke damage, as they can react with smoke residue and produce toxic fumes.
- Seal Unfinished Surfaces: If your walls or ceilings have unfinished surfaces, consider sealing them with a protective coating after cleaning to prevent future smoke damage absorption.
- Tackle HVAC Systems: Don't overlook your heating, ventilation, and air conditioning (HVAC) systems, as they can harbor smoke particles and distribute them throughout your home. Consider hiring a professional to inspect and clean your HVAC system to prevent recontamination of cleaned surfaces.
- Professional Help: If the smoke damage is extensive or if you're uncertain about the cleaning process, it's best to seek help from professional damage restoration contractors. Their expertise and specialized equipment can speed up the restoration process while ensuring optimal results and safety.
Contact SERVPRO of Weymouth, Hingham, and Quincy
Dealing with Weymouth fire damage and smoke damage on walls and ceilings can be challenging, but it is possible to restore your property to its pre-fire condition. For professional assistance, don't hesitate to contact SERVPRO of Weymouth, Hingham, and Quincy. Call us at (781) 337-0344 or submit our online form. We are here to offer 24/7 fire damage emergency services.
Tackling Commercial Property Water Damage: Tips and Solutions
4/30/2024 (Permalink)
 commercial property water damage
Water damage in commercial properties can spell trouble for business owners and property managers. From structural issues to potential health hazards, the consequences of commercial property water damage can be significant. In this blog post, we'll delve into the causes of such damage, its effects, and most importantly, how to effectively tackle it on your own or with the help of professional commercial water damage restoration services.
How Can Water Damage Your Commercial Property?
Water damage can wreak havoc on commercial properties in different ways. Whether it's from a burst pipe, a leaky roof, or a flooding event, water seepage can affect the integrity of the building's structure. It can seep into walls, floors, and ceilings, leading to mold growth, rotting wood, and weakened foundations. In addition, stagnant water can become a breeding ground for bacteria and other pathogens, leading to health risks to occupants.
Common Causes of Water Damage in Commercial Properties
Water damage in commercial properties can be caused by different factors. The most common factors contributing to water damage in commercial properties are the following:
- Leaking Pipes and Plumbing: Old or damaged pipes can leak, causing water to accumulate in hidden spaces.
- Roof Leaks: Cracks or missing shingles in the roof can allow water to seep into the building during rainfall.
- Appliance Malfunctions: Faulty equipment such as water heaters or HVAC systems can lead to leaks or flooding.
- Natural Disasters: Events like hurricanes, heavy rainfall, or flash floods can cause extensive water damage.
What Does It All Affect?
Water damage doesn't just impact the physical structure of the property. It can also affect its value and functionality. Untreated water damage can lead to costly repairs and renovations, lowering the property's resale or rental value. Moreover, it can disrupt business operations, leading to financial losses and inconvenience for tenants or customers.
In addition, the presence of water damage can tarnish the reputation of the business, affecting customer trust and loyalty. Therefore, tackling water damage on time is crucial. This protects both the building's structure and the safety and reputation of those who use it.
How to Tackle Commercial Property Water Damage: DIY Solutions
While some minor water damage issues can be tackled by property owners, significant damage requires professional intervention. Here are some DIY solutions for minor water damage:
- Identify and Fix Leaks: Inspect plumbing fixtures and appliances for leaks, and repair them as soon as possible.
- Absorb Excess Water with Towels and Rags: Use towels, rags, or even old clothing to soak up excess water from surfaces. Press firmly to encourage absorption, and wring out and replace the towels as needed.
- Increase Air Circulation with Fans: Maximize airflow by using household fans or opening windows and doors. This can help speed up the drying process by evaporating moisture more quickly.
- Use Sunlight: If weather permits, take advantage of sunlight by opening curtains or blinds to let natural light in. Sunlight can help dry out damp areas and stop mold growth.
- Use Natural Dehumidifiers: Place bowls of activated charcoal or uncooked rice in the affected areas to naturally absorb moisture from the air. Replace the charcoal or rice regularly as they become soaked.
- Sprinkle Baking Soda: Sprinkle baking soda liberally over damp carpets, rugs, or upholstery to absorb moisture and neutralize odors. Let it sit for several hours or overnight before vacuuming it up.
- Apply Vinegar Solution for Disinfection: Create a solution of equal parts water and white vinegar and spray it onto hard surfaces to disinfect and prevent mold growth. Allow it to sit for a few minutes before wiping it away with a clean cloth.
When to Call in Professional Help? Professional Step-by-Step Mitigation
If you encounter significant water damage or are unsure of the extent of the problem, it's best to call in professionals. Commercial water damage restoration experts have the expertise and equipment to mitigate water damage. Their step-by-step process typically includes:
- Assessment: Thorough inspection to assess the extent of the damage and identify potential hazards.
- Water Extraction: Removal of standing water using powerful pumps and extraction equipment.
- Drying and Dehumidification: Using industrial-grade air movers and dehumidifiers to dry out the affected areas completely.
- Cleaning and Sanitization: Disinfection of surfaces to prevent mold growth and eliminate any lingering odors.
- Restoration: Repair and restoration of damaged materials to bring the property back to its pre-damaged condition.
Prevention Tips
Prevention is key to avoiding the headache and expense of water damage. Here are some tips to safeguard your commercial property:
- Regular Maintenance: Schedule routine inspections and maintenance for plumbing, roofing, and HVAC systems.
- Weatherproofing: Seal windows, doors, and other openings to prevent water seepage during storms.
- Upgrade Plumbing Fixtures: Think about upgrading to water-efficient plumbing fixtures and appliances to reduce the risk of leaks and water waste. Install leak detection devices on vulnerable plumbing connections.
- Employee Education: Educate employees on proper water usage and the importance of reporting leaks quickly.
- Protect Documents and Electronics: Store important documents and sensitive electronic equipment in waterproof containers or cabinets, especially in areas prone to water damage such as basements or storage rooms.
- Emergency Preparedness: Develop an emergency plan that outlines procedures for dealing with water damage incidents.
- Grading and Drainage Systems: Consider investing in landscaping features such as grading and drainage systems to divert water away from the property's foundation, reducing the risk of water intrusion.
- Invest in Flood Insurance: Look into purchasing flood insurance, even if your property is not located in a high-risk flood zone. It can provide financial protection in the event of water damage from flooding or storm surges.
Contact SERVPRO of Weymouth for Your Commercial Property Water Damage
If you're dealing with commercial property water damage that's beyond DIY solutions, don't hesitate to reach out to the professionals. SERVPRO of Weymouth specializes in commercial water damage restoration and can provide timely and effective solutions to mitigate the damage. Contact us today to schedule an assessment and get your property back to its pre-damaged state. Give us a call at (781) 337-0344 or send us a message through our online form.
The 3 Water Damage Categories and How to Clean Each Up
3/19/2024 (Permalink)
 Facing water damage? Understand its severity, the three water damage categories for effective response, and the concept of category deterioration.
When facing water damage restoration in Weymouth, understanding the severity of the damage is crucial. Water damage can stem from various sources, each presenting different levels of contamination. Knowing the three water damage categories can help homeowners or property managers respond effectively to minimize further harm. We’ll walk you through what each of these categories involves, how to clean them up, and what the category deterioration refers to. Besides, if you happen to need a company dealing with water damage restoration in Weymouth, we’ve got you covered! Keep reading to find out more!
What Are 3 Categories of Water?
These categories of water refer to the degree of cleanliness and potential health hazards associated with the water. The IICRC Standard for Professional Water Damage Restoration defines these three main categories of water damage based on the level of contamination. This standard and the categories ensure consistency and professionalism in restoration practices, helping professionals and homeowners assess the risk associated with the water damage and determine the appropriate cleanup procedures accordingly.
Categories of Water Damage
Water damage can wreak havoc on homes and properties, but not all water is created equal when it comes to potential health risks. Understanding the three categories of water damage is significant for effective cleanup, mitigation, and restoration. So, let’s dive into the details of water damage categories together for a clearer perspective!
Category 1 Water - Sanitary ("Clean Water")
Category 1 water damage involves water from a clean and sanitary source. This type of water carries the least risk to human health since it does not contain significant levels of contaminants. Common sources of Category 1 water damage include broken pipes, overflowing sinks, or rainwater leaks.
Cleanup Approach:
Since Category 1 water is clean, the cleanup process primarily involves removing the excess water and drying the affected area. Using fans, dehumidifiers, and proper ventilation can speed up the drying process and prevent mold growth. It's essential to act quickly to prevent the water from absorbing into building materials, which can lead to structural damage.
Category 2 Water - Significantly Contaminated ("Grey Water")
Category 2 water damage involves water that contains significant levels of contaminants, but not sewage. This type of water may cause health issues if swallowed or exposed to the skin. Common sources of Category 2 water damage include washing machine overflows, and dishwasher leaks.
Cleanup Approach:
Cleaning up Category 2 water damage requires protective gear, such as gloves and masks because of the presence of contaminants. The affected area should be thoroughly cleaned and disinfected to prevent the spread of bacteria and pathogens. Depending on the extent of the damage, professional water damage restoration services may be needed to ensure proper cleanup and sanitization.
Category 3 Water - Grossly Contaminated ("Black Water")
Category 3 water damage involves water that is grossly contaminated and carries severe health risks. This type of water contains sewage, chemicals, or other harmful substances. Category 3 water damage can result from sewer backups, flooding from rivers or streams, or toilet overflows containing feces.
Cleanup Approach:
Cleaning up Category 3 water damage requires extreme caution and should only be handled by trained professionals equipped with the necessary protective gear and specialized equipment. Given the high level of contamination, affected materials may need proper removal and disposal. Thorough disinfection and decontamination are essential to ensure the safety of occupants and prevent the spread of diseases.
Category Deterioration
It's important to know that water damage can get worse over time if not taken care of. Category deterioration means water contamination can go from a lower to a higher, more dangerous level. This happens as clean water sits still and mixes with different materials, causing germs to grow and more harmful substances to get in.
For example, Category 1 water damage left untreated can degrade into Category 2 or even Category 3 water damage. Factors such as time, temperature, and environmental conditions can speed up this deterioration process. As water sits still, it becomes a perfect breeding ground for bacteria, and viruses, worsening indoor air quality and carrying health risks to occupants.
To minimize category deterioration and prevent further contamination, it's crucial to act fast after a water damage incident. Even seemingly clean water can become more dangerous over time if not properly tackled. Professional water damage restoration companies can assess the extent of the damage, carry out appropriate cleanup measures, and prevent category deterioration through thorough drying, disinfection, and restoration efforts.
Understanding the three water damage categories is vital for effective cleanup and restoration efforts. Whether dealing with clean water damage or grossly contaminated black water damage, taking quick action can limit the damage, lower repair costs, and keep indoor spaces safe and healthy in the long run. Understanding category deterioration and its effects on water damage cleanup helps you protect your property and the health of those living inside.
Reach Out to SERVPRO of Weymouth, Hingham and Quincy
If faced with water damage in Weymouth, seeking professional water damage restoration services can help safeguard the health and well-being of occupants. Contact SERVPRO of Weymouth, Hingham and Quincy for immediate help with water damage cleanup and restoration tasks! Do so by calling (781) 337-0344 or by filling out an online form on our website! Don't delay tackling water damage issues, as quick action can make all the difference in minimizing damage and restoring your property to its preloss condition. Our team of professionals offers you 24/7 emergency services!
How to Fix Water Damage in the Basement
3/12/2024 (Permalink)
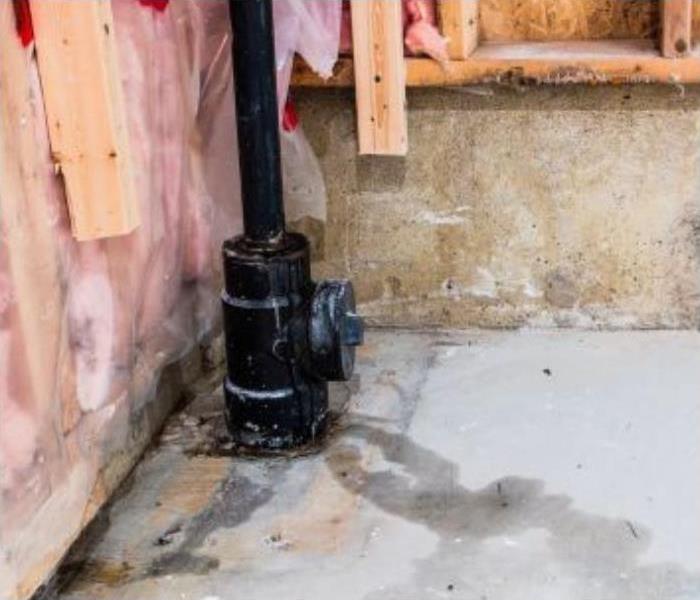 Facing water damage in your basement? Learn how to fix it with our guide. Find solutions, preventive tips, and a professional help recommendation.
Are you facing the frustrating issue of water in your basement? Dealing with water leaking into basement can be a challenging task, but fear not! In this guide, we'll walk you through the steps on how to fix water damage in the basement. From identifying the causes to implementing effective solutions, we've got you covered. Besides, if you need professional help in dealing with Weymouth water damage restoration, the recommendation is out there if you keep reading.
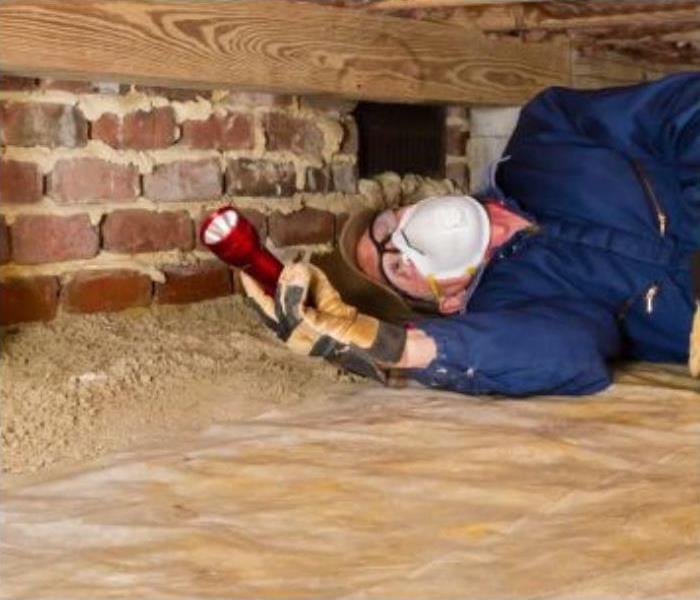
Causes of Water Damage in the Basement
Before diving into solutions, it's essential to understand what causes water damage in the basement. Common culprits include:
- Poor Drainage: When rainwater isn't properly diverted away from your home, it can seep into the basement. This can lead to dampness and mold growth, creating a breeding ground for pests.
- Cracks and Gaps: Cracks in the foundation or gaps around windows and doors provide pathways for water to enter. These openings can also weaken the structural integrity of your home over time.
- Sloping Landscape: If your yard slopes towards the house, rainwater can accumulate near the foundation and find its way into the basement. This can result in erosion of the soil around your home's foundation.
- Clogged Gutters: Gutters and downspouts that are clogged or damaged can lead to overflow, resulting in water pooling around the foundation. This standing water can attract mosquitoes and other insects, which can be annoying and even present a potential health risk.
Tackling Water in Basement
It's also important to emphasize the importance of proactive maintenance to prevent water damage in the basement. Regularly inspecting your home for signs of water seepage and tackling any issues quickly can save you time, money, and headaches down the line. Keep an eye out for dampness, mold growth, or musty odors, as these can indicate underlying water problems. By staying alert and proactive, you can nip potential issues in the bud and protect your basement from water damage.
How to Fix Water Damage in the Basement
Now that you understand the potential causes and preventive measures, let's discuss how to tackle water damage in the basement. Remember, by following these solutions, you can handle water damage in your basement and safeguard your home from future incidents.
- Extend Gutters: Make sure your gutters are long enough to carry water away from your house (at least 10 feet away). This helps keep water from getting close to your home's foundation.
- Plug Gaps: Seal any cracks or gaps in the foundation, windows, and doors to prevent water from sneaking inside and seeping.
- Restore the Crown: Fix the slope of the ground around your home so water flows away from the house. This helps keep water from collecting near the foundation.
- Reshape the Landscape: Change the shape of your yard so water moves away from your home's foundation. This stops water from gathering near your basement walls.
- Fix Footing Drains: Check that any drains near your house are in good condition. These drains help move water away from your home's foundation.
- Install a Curtain Drain: Consider adding a special drain around your home. This drain, also known as a curtain drain, catches and moves water away from your home's foundation.
- Remove the Water with Pump: If your basement floods, use a pump to get rid of the water fast. This helps prevent damage to your basement and belongings.
- Make the Walls Waterproof: Put a special coating on your basement walls to stop water from seeping in. This protects your basement from water damage.
- Improve Indoor Air Quality (IAQ): Damp environments are breeding grounds for mold and mildew, which can affect IAQ and lead to respiratory problems. To improve IAQ, ensure proper ventilation and consider using dehumidifiers to reduce moisture levels in the basement. Besides that, inspect and clean HVAC systems to prevent the spread of particles (contaminants) carried through the air. Prioritizing IAQ creates a healthier living environment for you and your family.
Seeking Professional Help
If you're facing extensive water damage in your basement, don't hesitate to seek professional help from a reputable water damage restoration company. They have the expertise and equipment to assess the situation and provide effective solutions to restore your basement to its pre-damaged condition.
Reach Out to SERVPRO of Weymouth, Hingham and Quincy for Immediate Help with Basement Water Damage
If you live in Weymouth area, and are unsure who to contact for your water damage concerns, SERVPRO of Weymouth, Hingham and Quincy is Here to Help®! With over 20 years of experience in the restoration industry, our IICRC-certified team is fully equipped to take care of your water-damaged basements and much more than that! We are available 24/7 for your emergency needs! So, don’t wait, contact us today at (781) 337-0344 or submit an online contact form on our website for a free consultation!
How to Fix Water Damaged Wood Furniture After a Flood
3/5/2024 (Permalink)
 Learn how to fix water damaged wood furniture after a flood with our guide. Discover expert tips for successful restoration and further damage prevent
Handling water damage to wooden furniture post-flood can be tough. Whether it's an antique dresser or a modern table, water can harm wood if not treated promptly. In flood-prone areas, knowing how to deal with the aftermath is crucial. This guide explores flood effects on wood furniture and offers steps to repair water-damaged wood, restoring your pieces. For those skeptical about tackling the task of water damage restoration Ogden UT, we’ve got you covered with an expert recommendation!
How Does Flood Affect Wood Furniture?
Wood is highly susceptible to water damage. But, how does water damage wood? When exposed to floodwaters, wood absorbs moisture, causing it to swell, warp, and potentially develop mold and mildew. This can lead to structural instability and permanent damage if left untreated. Additionally, prolonged exposure to moisture can cause wood to lose its strength and integrity, making it more prone to cracks and breakage.
What to Do After a Flood Damaged My Wood Furniture?
Facing water damage to your wood furniture after a flood can feel overwhelming, but taking the right steps can help salvage your cherished pieces. Here's a detailed guide on what to do:
Step 1: Quick Removal
As soon as you can, move the water-damaged furniture away from the flooded area to a dry spot. This helps prevent further soaking and potential mold growth.
Step 2: Drying Process
Using absorbent towels or cloths, gently blot away any excess water from the surface of the furniture. Avoid rubbing, as this can cause further damage.
Step 3: Air Circulation
Ensure good air circulation around the furniture by opening windows and using fans or dehumidifiers. This helps speed up the drying process and prevents mold and mildew from forming.
Step 4: Gentle Cleaning
If the furniture is muddy or dirty from the floodwater, lightly clean it with a mixture of mild soap and water. Be careful not to saturate the wood, as this can make the damage worse.
Step 5: Evaluation
Take a close look at the extent of the damage. Check for signs of warping, cracking, or mold growth. This assessment will help determine the next steps in the repair process.
By following these steps quickly and carefully, you can increase the chances of restoring your water-damaged wood furniture. Remember, if you're unsure or if the damage is extensive, it's best to seek professional help from a water damage restoration contractor certified by the IICRC.
How to Fix Water Damaged Wood Furniture
If you are still up to repairing damaged wood furniture yourself, you should know it also depends on the type of furniture and damage it has sustained. Here's a step-by-step guide to help you tackle the task:
If Furniture is Wet:
Step 1: Thorough Drying
Start by removing as much moisture as possible from the wood furniture. Use towels or cloths to blot away excess water, and then place the furniture in a dry, well-ventilated area.
Step 2: Air Circulation
Promote air circulation around the wet furniture by opening windows and using fans or dehumidifiers. This helps speed up the drying process and prevents mold growth.
Step 3: Gentle Cleaning
If the furniture is dirty from the floodwater, gently clean it with a mixture of mild soap and water. Be careful not to soak the wood, as this can cause further damage.
Step 4: Assessment
Once the furniture is dry to the touch, carefully inspect it for any signs of damage such as warping or mold growth. Take note of areas that may need extra attention during the repair process.
Step 5: Sanding
If the wood surface appears rough or uneven after drying, lightly sand it with fine-grit sandpaper to smooth out any imperfections. This prepares the surface for further treatment.
Step 6: Conditioning
Apply a wood conditioner or sealant to the dried wood surface. This helps restore moisture and protects the wood from future damage.
Step 7: Final Drying
Allow the furniture to dry completely before using it again. This ensures that the wood is fully restored and ready for use.
If Furniture is Dry:
Step 1: Inspection
Carefully examine the dry wood furniture for any remaining damage, such as cracks, scratches, or discoloration. Take note of areas that may require repair or touch-up.
Step 2: Repairing Cracks
If there are cracks or gaps in the wood, fill them with wood filler or putty. Smooth the filler with a putty knife and allow it to dry completely before sanding.
Step 3: Sanding
Once the filler is dry, sand the repaired areas gently to blend them seamlessly with the surrounding wood surface. Use fine-grit sandpaper for best results.
Step 4: Staining or Painting
If necessary, apply a wood stain or paint to the repaired areas to match the color and finish of the rest of the furniture. Allow the stain or paint to dry completely before using the furniture.
Step 5: Final Touches
Inspect the repaired areas and make any final adjustments as needed. This ensures that the wood furniture looks its best and is fully restored to its original condition.
Water damage to wood furniture can be a challenging problem to tackle, but with the right knowledge and techniques, it is possible to restore your beloved pieces to their former glory. By understanding the effects of floods on wood and following the proper steps for repair, you can salvage your furniture and prevent further damage.
Water Damage Professional Help at SERVPRO of Weymouth, Hingham and Quincy
If you live in Ogden, Utah, and are unsure of how to tackle the task on your own, we have a reliable team for your water damage concerns! At SERVPRO of Weymouth, Hingham and Quincy, we understand the toll of the water damage on your furniture and property. We provide emergency services 24/7 with response times within the hour. Our experienced IICRC-certified technicians are committed to providing you with the highest level of service! Yours is just to call (781) 337-0344 or submit a contact form on our website.
7 Steps to Take If You Know You're Buying a Home with Water Damage
2/27/2024 (Permalink)
 Learn essential steps for buying a home with water damage, from gathering info to professional restoration. Achieve success with our guide!
Navigating the purchase of a home is a thrilling yet challenging endeavor, especially when faced with the reality of buying a home with water damage. While this revelation may initially appear discouraging, there are actionable steps you can take to address the situation and proceed towards making that dream home yours. In this blog post, we'll outline essential strategies to guide you through the process of purchasing a home with water damage, from making informed decisions to enlisting professionals for water damage restoration Weymouth. We'll help you achieve successful resolution of any challenges encountered along the way.
1. Prepare Questions for the Homeowner or Real Estate Agency
The first step in dealing with a potential water-damaged house is to gather information by preparing a set of questions for the homeowner or the real estate agency. These questions can cover various aspects, such as any known history of water damage, recent repairs, or any preventive measures taken. By seeking answers to these questions upfront, you can gain valuable insights into the property's condition and make an informed decision about whether to proceed with a professional home inspection or negotiate terms with the seller.
2. Determine the Cost of Necessary Water Damage Repairs and Remediation
After gathering information about the water damage, the next crucial step is to assess the financial implications by determining the cost of necessary repairs and remediation. There are several ways to estimate these costs:
- Obtain Estimates from Different Contractors: Reach out to reputable water damage restoration contractors in your area and request detailed estimates for the required repairs. Having multiple quotes allows you to compare costs, services, and timelines. Ensure that the estimates include a breakdown of expenses, so you have a clear understanding of what each contractor is proposing.
- Research Market Values for Comparable Houses: Consult real estate agencies to gather market values for similar houses in the area without water damage. This information can provide a benchmark for understanding the potential impact of water damage on the property's overall value. It may also serve as valuable negotiation leverage when discussing repair costs with the seller.
- Factor in Additional Costs: In addition to direct repair costs, consider any additional expenses that may arise during the remediation process. This could include temporary housing costs if the property is uninhabitable during repairs or any hidden structural issues uncovered during the restoration process. Having a comprehensive understanding of all potential costs is vital for accurate financial planning.
By thoroughly exploring these avenues, you can develop a clear picture of the financial aspects associated with repairing water damage. This knowledge not only helps in budgeting effectively but also empowers you to make informed decisions during the home-buying process.
3. Get Adequate Homeowner's Insurance
One often overlooked aspect of buying a home with water damage is ensuring you have the right homeowner's insurance in place. Regular policies may not cover water damage, or there might be limitations. Speak with your insurance provider to discuss specific coverage for water-related issues. Being proactive about insurance can save you from unexpected financial burdens down the line.
4. Understand the Requirements of Buying a House
In the process of purchasing a water-damaged house, it's crucial to understand the overall requirements of buying a house. This includes legal considerations, paperwork, and compliance with local regulations. Be diligent in reviewing contracts and consult with legal professionals if needed to ensure a smooth and legally sound home-buying process.
5. Use Professional Water Damage Restoration Services
When it comes to addressing water damage, it's essential to enlist the help of professional water damage restoration services. These experts have the knowledge, skills, and equipment to effectively remediate water damage and restore your new property to excellent condition. Don't underestimate the importance of a thorough restoration process in maintaining the structural integrity and safety of your home.
6. Research Local Water Damage Restoration Services
When facing the prospect of buying a home with water damage, it's essential to research and identify reputable local water damage restoration services in the Weymouth area. Understanding the expertise and track record of these professionals is crucial for ensuring that the necessary repairs are carried out effectively. Look for customer reviews, testimonials, and certifications to make an informed decision about the restoration team you choose.
7. Plan for Preventive Measures
Once the water damage has been addressed and your new home is on its way to recovery, it's time to plan for preventive measures. Work with your water damage restoration professionals to identify areas of vulnerability and implement strategies to prevent future issues. This may include improved drainage systems, regular inspections, or simple home maintenance practices. Taking proactive steps now can save you from potential headaches and expenses in the future.
Reach Out to SERVPRO of Weymouth, Hingham and Quincy for Immediate Assistance
Purchasing a home with water damage presents its challenges, but with the right approach, it's possible to turn this situation into an opportunity. By gathering information, assessing repair costs, securing adequate insurance, understanding legal requirements, and enlisting professional restoration services, you can navigate the process with confidence. Remember to research local restoration services and negotiate terms with the seller to ensure a successful outcome. With careful planning and proactive measures, you can soon transform that water-damaged house into your dream home, ready to welcome you for years to come. Contact us at (781) 337-0344 or fill out the contact form on our website! At SERVPRO of Weymouth, Hingham and Quincy, our IICRC-certified team is committed to providing you with the highest level of service!
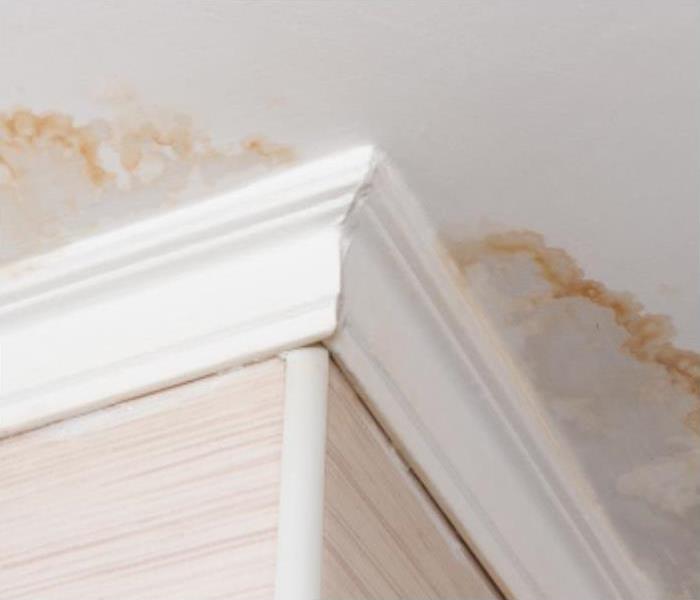
How to Fix Ceiling Water Damage After a Leak
2/22/2024 (Permalink)
 Discover how to fix ceiling water damage with the assistance of our comprehensive guide, ensuring a smooth restoration process for your home.
Water damage can be a persistent challenge for homeowners, particularly when it infiltrates the ceiling. Whether it stems from a leaky roof, a burst pipe, or a malfunctioning appliance, addressing ceiling water damage quickly is crucial for the prevention of further complications. In this comprehensive guide about water damage restoration, we'll delve into the intricacies of understanding, identifying, and effectively repairing ceiling water damage.
What is Water Damage After a Leak?
When it comes to safeguarding your home, quick water damage restoration is essential, especially after a leak. This type of damage occurs when unwanted water accumulates in areas it shouldn't, potentially leading to structural issues and health hazards. Ceiling water damage often results from leaks originating above, such as a damaged roof or a plumbing malfunction.
Types of Ceiling Water Damage
As water damage can manifest in various ways, understanding the types of damage is crucial for effective mitigation. Each type requires a specific approach to restoration to ensure a thorough and lasting solution.
- Water Stains: Water stains are visible indicators of ceiling water damage, often appearing as unpleasant brown discolorations. These stains can spread over time if not immediately addressed, making them a clear sign of water infiltration and a potential need for water damage drywall ceiling repair.
- Sagging or Bulging: Excess water saturating the ceiling material can compromise its structural integrity, causing it to sag or bulge. Recognizing sagging or bulging is crucial, as it indicates significant water damage that requires immediate attention.
- Peeling Paint or Wallpaper: The presence of excess moisture can cause the paint or wallpaper on your ceiling to peel or bubble. Beyond being aesthetically unpleasing, this indicates ongoing water damage that needs to be resolved.
- Mold Growth: Perhaps the most alarming consequence of water damage is the potential growth of mold. Thriving in damp environments, mold poses serious health risks and requires quick remediation to prevent further harm.
How to Repair a Ceiling from Water Damage
Now you are familiar with the types of ceiling water damage, but you are still wondering how to fix water damaged ceiling. Addressing ceiling water damage involves a systematic approach to ensure effective and lasting restoration. From identifying the source of the leak to repairing or replacing damaged materials, each step plays a crucial role in the restoration process. Here are the details regarding these steps:
- Identify and Fix the Source of the Leak
Before addressing the ceiling damage, pinpoint and fix the source of the leak. Whether it's a roof issue, a burst pipe, or a malfunctioning appliance, resolving the root cause is paramount to prevent recurring damage.
Carefully remove any wet or damaged materials from the affected area. This may include wet insulation, ceiling tiles, or sections of drywall. Be cautious, as wet materials can be heavy and prone to collapsing.
Utilize fans and dehumidifiers to thoroughly dry out the affected area. This step is critical in preventing mold growth. Ensure the space is completely dry before proceeding with repairs.
- Repair or Replace Damaged Ceiling Materials
The extent of the water damage will determine whether a simple patch or the replacement of entire sections of drywall or ceiling tiles is necessary. Professional assistance is advisable for severe damage, particularly if structural issues are involved.
- Repaint or Reapply Wallpaper:
Once you managed to fix water damage ceiling, and the area is dry, restore the aesthetic appeal of your ceiling by repainting or reapplying wallpaper.
The Importance of Timely Intervention
Immediate and decisive action is substantial when dealing with ceiling water damage. Ignoring or delaying repairs can worsen the situation, leading to more extensive damage, increased repair costs, and potential health hazards. Mold, in particular, can start growing within 24 to 48 hours of water exposure, emphasizing the urgency of fast intervention. Timely repairs not only safeguard the structural integrity of your home but also contribute to a healthier living environment.
Preventing Future Water Damage
Beyond addressing current water damage, it's equally important to take preventative measures to avoid future incidents. Regularly inspect your roof for signs of damage, keep gutters clean to ensure proper drainage, and promptly fix any plumbing issues. Besides, consider installing leak detectors or smart home water monitoring systems to receive timely alerts in case of potential leaks. These proactive steps can significantly reduce the risk of future ceiling water damage, providing peace of mind for homeowners.
Navigating Insurance and FEMA Assistance
In some cases, homeowners may be eligible for insurance coverage to assist with water damage restoration. Familiarize yourself with your insurance policy and understand the coverage it provides for water damage. Additionally, in situations involving widespread damage, such as natural disasters, the Federal Emergency Management Agency (FEMA) may offer assistance. It's crucial to stay informed about FEMA programs, eligibility criteria, and the application process. Seeking assistance from these avenues can help ease the financial burden associated with extensive water damage restoration.
Efficient Water Damage Restoration at SERVPRO of Weymouth, Hingham and Quincy
Ceiling water damage, though challenging, is manageable to some extent with the right approach. By understanding the signs, taking fast action, and implementing preventative measures, homeowners can mitigate the impact of water damage on their homes. Whether you're addressing a small water stain or a more significant structural issue, the key is to approach repairs with a sense of urgency. Remember, a well-informed homeowner is better equipped to navigate the restoration process and maintain a safe, comfortable living space for years to come. Yet, it is important to note that certified professionals like SERVPRO of Weymouth, Hingham and Quincy can approach water damage restoration tasks with the utmost precision and care! Our team with their expertise and equipment will fix your water damage ceilings in no time! Do not hesitate to contact us at (781) 337-0344!
The 5 Fire Types: What Type of Fire Can Be Put Out Safely with Water?
2/22/2024 (Permalink)
 Discover what type of fire can be safely extinguished with water. Explore extinguishing methods and prevention steps for each of the 5 fire types.
As individuals seeking to ensure our homes and loved ones are safe, understanding the basics of fire and how to handle it is crucial. Fires come in various forms, each with its characteristics and dangers. Knowing which fires can be safely put out with water is essential knowledge for anyone concerned about fire safety. In this comprehensive blog post, we'll explore the five primary fire types, fire damage prevention across all fire types, and answer the burning question: what type of fire can be extinguished safely using water? Plus, if you need help with fire damage Weymouth MA, we’ve got you covered.
Fire Classification: What Type of Fire Can Be Put Out Safely with Water?
Before we delve into specific fire types, let's establish a foundational understanding of fire classification. Fires are categorized into different classes based on the type of fuel involved. This classification system helps firefighters and damage restoration professionals in determining the most effective extinguishing agents for each type of fire.
- Class A Fires
Class A fires involve ordinary flammable materials such as wood, paper, cloth, and certain plastics. These fires leave behind ash when extinguished. Water is widely recognized as an effective extinguishing agent for Class A fires. It works by cooling the burning material and removing heat from the fire triangle, effectively stifling the flames.
- Class B Fires
Class B fires encompass flammable liquids and gases, including gasoline, oil, grease, and chemicals. Unlike Class A fires, water can intensify Class B fires by spreading the flammable liquid and intensifying the blaze. Foam or dry chemical extinguishers are typically recommended for Class B fires to smother the flames and prevent reignition.
- Class C Fires
Class C fires involve energized electrical equipment, such as appliances, wiring, and circuit breakers. Using water to extinguish Class C fires poses significant risks, as water conducts electricity and can lead to electric shock or electrocution. Carbon dioxide or dry chemical extinguishers are safer alternatives for Class C fires.
- Class D Fires
Class D fires entail flammable metals such as magnesium, titanium, and potassium. Water should never be used to extinguish Class D fires, as it can react violently with the burning metal, potentially causing explosions. Specialized dry powder extinguishing agents are specifically designed for resisting Class D fires.
- Class K Fires
Class K fires involve cooking oils, fats, and greases commonly found in commercial kitchens. Water is ineffective and can even be hazardous when used to extinguish Class K fires, as it can cause hot oil or grease to splatter and spread, intensifying the fire. Wet chemical extinguishers are specifically formulated for Class K fires, creating a cooling effect and forming a barrier to prevent rekindling.
Fire Safety and Damage Prevention Across 5 Fire Types
Now that you know what are 5 fire types and how to extinguish them, let’s move forward with the next step: fire safety and damage prevention. Protecting your home or business from fires requires a tailored strategy for each fire type. Here are seven crucial steps, from installing detectors to investing in suppression systems, ensuring comprehensive fire safety.
- Installing and maintaining smoke detectors and fire alarms: Smoke detectors are crucial for early fire detection, but certain fires, like Class C (electrical fires), may not produce visible smoke. Consider installing fire alarms to detect temperature spikes or electrical issues. This can minimize the risk of smoke damage and personal harm.
- Developing and practicing a fire escape plan: A fire escape plan, tailored to specific hazards, is crucial for all fire types. In kitchens prone to Class K fires, ensure the plan avoids water use to prevent fire escalation.
- Properly storing flammable materials and chemicals: This step is vital for preventing Class B fires with flammable liquids and gases. Store materials safely away from potential fire sources, use approved containers, and ensure adequate ventilation in storage areas.
- Regularly inspecting and maintaining electrical systems and appliances: Electrical fires (Class C) often stem from faulty wiring or appliances. Regular maintenance can spot hazards and prevent fires. Encourage professional inspections and repairs.
- Ensuring proper ventilation: Proper ventilation reduces fire risk, especially in areas prone to grease buildup or flammable vapors, such as kitchens (Class K fires) and industrial settings. Adequate ventilation helps dissipate heat and reduces the likelihood of fires spreading or rekindling.
- Training employees in fire safety protocols: In commercial settings, fire safety training for employees is vital for prevention and effective response. Provide training on fire classes and proper extinguishing methods. For instance, restaurant staff should know how to use wet chemical extinguishers for Class K fires.
- Investing in fire suppression systems: Fire suppression systems, like sprinklers and extinguishers, quickly control fires and limit damage. Choose the right system for specific fire risks. For instance, install a kitchen hood suppression system for Class K fires in commercial kitchens.
Understanding the various fire types and their respective extinguishing methods is crucial for effective fire safety and damage restoration efforts. While water remains a versatile and widely used extinguishing agent for Class A fires, it's important to recognize its limitations and potential hazards in other fire scenarios. By staying informed and prepared, damage restoration contractors can better serve their clients and communities in times of crisis.
Call SERVPRO of Weymouth, Hingham and Quincy
At SERVPRO of Weymouth, Hingham and Quincy, we are committed to solving all fire damage restoration needs. From initial and ongoing training at SERVPRO’s corporate training facility to regular IICRC-industry certification, rest assured our staff is equipped with the knowledge to restore your property. Reach out to our team by calling (781) 337-0344 or filling out a form on our website.
How To Repair Water-Damaged Drywall
12/28/2023 (Permalink)
 How to Repair Water-Damaged Drywall - An Expert Guide
Whether it comes from a plumbing problem, a natural disaster, or any other source, water inside your home is never a good thing. Even if there isn’t any standing water, the moisture can cause major problems, and you probably want to know how to repair water damaged drywall. Here, our team at SERVPRO of Weymouth, Hingham, and Quincy offers tips for restoring drywall after water damage to prevent mold growth and further damage.
What Happens When Drywall Gets Wet?
In most cases, water is the enemy of drywall or sheetrock. Contractors typically use a specific type of wall material in bathrooms or other places where it’s likely to experience more moisture. Elsewhere, the wall material should remain dry to ensure structural integrity and prevent mold and mildew infestation.
Water damage on walls can range from unsightly yellowish-brown stains and musty smells to a complete collapse. You might notice that paint or wallpaper starts to bubble or peel, or even water dripping from the walls or ceilings. Soaked sheetrock often feels soft and crumbly, leaving a chalky film on your hands when you touch it.
In extreme cases, water damage on wall boards causes them to buckle, warp, or even collapse. Without immediate repair, moisture will cause mold to grow and spread, putting your family at risk for serious health issues.
Fixing Water-Soaked Drywall
The first step in water-damaged drywall installation is finding and fixing the source of the water. It’s not always immediately clear where the water is coming from, so it might require some investigation to locate and address the leak. Often, this means removing the drywall that has water damage to gain access to the pipes behind it and make repairs.
If the drywall sustains water damage from a flood, the first step is to remove the standing water and attempt to dry the material. It usually takes several days to dry wet sheetrock using fans and dehumidifiers, and even that isn’t a guarantee that it’s still structurally sound. Even after drying, you might still need professional guidance on how to repair water-damaged drywall.
How To Repair Minor Water-Damaged Drywall
If the damage is minimal and mostly cosmetic, you have a few options for restoration. Following some simple steps for repairing water-damaged sheetrock can keep your home in good condition and stop the damage from spreading.
When the damage is strictly cosmetic, you can remove stains and restore the finish by scraping bubbling or peeling paint off the wall and then sanding down the surface. Apply fresh coats of primer and paint and let them dry.
If the damage goes deeper but doesn’t affect any more than a small area (less than 6 inches square), you can remove the affected section and patch it with some new drywall. However, larger sections of damaged drywall, especially when they are moldy, usually need professional attention. If the water damage extends beyond 12 inches square, or a mold infestation covers more than 10 square feet of sheetrock, you need professional remediation.
Repairing Significantly Water-Damaged Drywall
Significant water damage that affects areas larger than 12 square inches or causes the wall to sag more than 3/8 of an inch requires replacing the entire sheetrock panel. Larger pieces of drywall need anchoring to the wall studs or ceiling joists, a project you should leave to a professional.
In fact, when it comes to disaster cleanup, it’s best to avoid DIY water-damaged drywall restoration for safety reasons. Mold is of particular concern when it comes to wet walls, and professional remediation and abatement professionals have the skills and equipment to deal with it without creating health risks for building occupants. Even without widespread mold, dealing with large sections of drywall can be challenging, as the material is often heavy and requires precision to guarantee a safe and seamless replacement.
Trust SERVPRO of Weymouth, Hingham, and Quincy to Deal With Water-Damaged Drywall
If this drywall water damage repair guide still has you wondering what to do about a problem in your South Shore home, get in touch with the cleanup and restoration experts of SERVPRO of Weymouth, Hingham, and Quincy for help at (781) 337-0344. These experienced and knowledgeable professionals can offer insight into how to repair water-damaged drywall and help you recover from a disaster with prompt extraction, drying, cleanup, and restoration services.
Whether your roof leaks or a pipe bursts in the basement, get the help you need to stop water damage fast and keep your home safe by contacting us.


 24/7 Emergency Service